Site Manager - Repositories - What are they?
Repositories are a predefined storage location that is used as the destination for your backups. A repository is a storage location with a standardized folder layout and some tracking information. Each repository contains backup information such as storage location, network access information, credentials required to access the resource and other basic storage management. The Site Manager server monitors the repositories and will periodically check the repository for backup files. These backup files can be browsed, restored, and verified.
Repositories can be viewed and managed using the ‘Repositories’ page of the Site Manager in the ‘Site Configuration’ drop-down menu. Selecting ‘New Repository’ will open the ‘Add Repository’ wizard. On the first page of the wizard, you can specify the type of repository that you want to create. The four types of repositories you can create are:
Network Share - Any windows or SMB network share may be used as a repository.
Amazon AWS Storage Gateway - If an AWS Storage Gateway is available, it can be used as a repository.
Azure Storage Account - If Azure storage is exposed as an SMB share in Azure, it can be used as a repository directly.
Local Repository - Storage which is attached locally to the computers being managed by Site Manager can be used as a repository. Due to the local repository path being evaluated separately by each agent, the Site Manager server cannot provide most management features for a local repository. This includes browsing, image verification, free space and status monitoring, Site Manager initiated restore and remote synchronization. Repository browsing and backup restores should be done using the Macrium Agent installed on the managed computers.
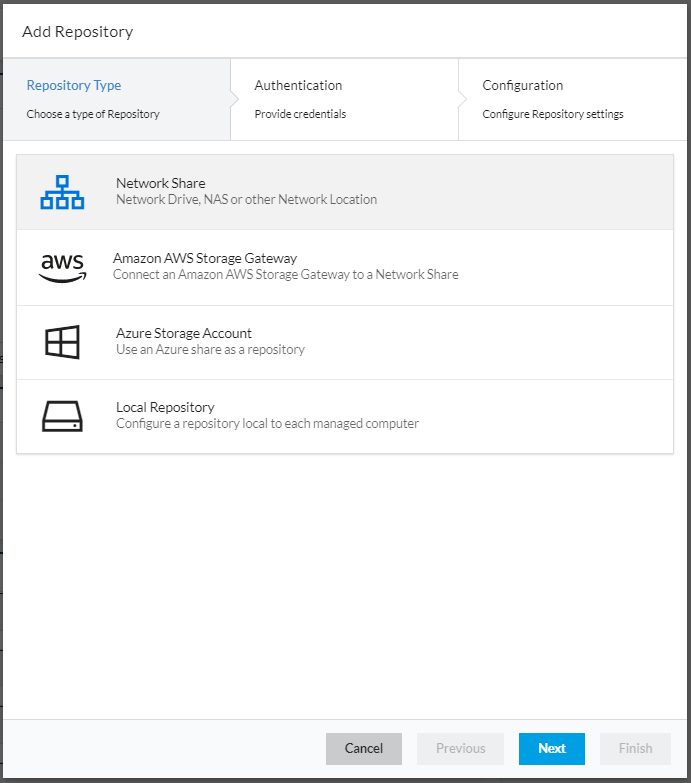
For more information about configuring the different types of repository, please see this knowledgebase article. In this example, we will be configuring a Network Share repository.
Creating a Windows Network Share
To create a Windows Network Share, create a folder on the drive where you want the share to be located. In this example, we are creating the network share on the Site Manager server itself, however, the share can be located anywhere that is accessible to the Site Manager and Agents (the Agents will directly back up to the network share, it is important that the Agents can access the share). Once you have created a folder on the chosen drive, right-click the folder and select ‘Properties’. In the Window that opens, select ‘Sharing’ then click ‘Share’. You can then specify user accounts and the permission level that they will have to the share.
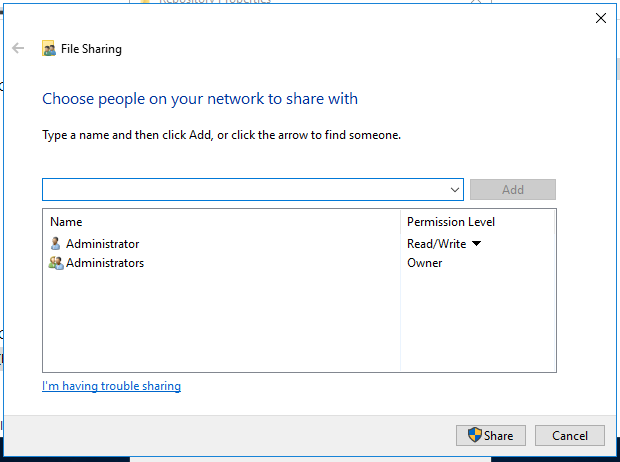
If there is a specific account that you want the backups to authenticate against the share with, enter the account here and ensure that it has read/write permissions. Once you are happy with the selection you have made, press ‘Share’.
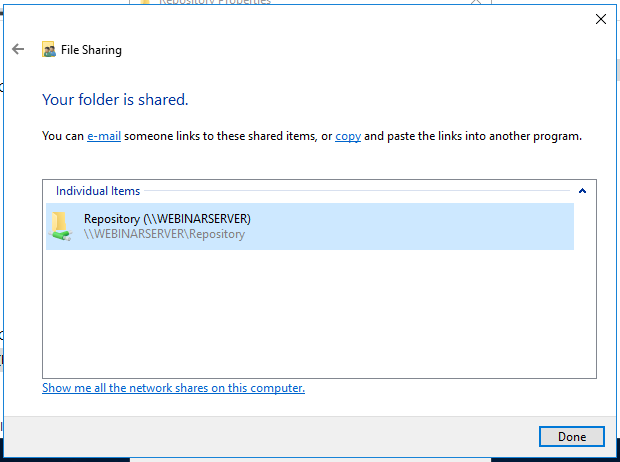
The final page of this window will display the UNC path to your share. Take note of this as it will be needed in the next step.
On the second page of the ‘Add Repository’ wizard, you can then enter the UNC path to the share that you created and the authentication credentials that you want to use to access the share.
End of Creating a network share
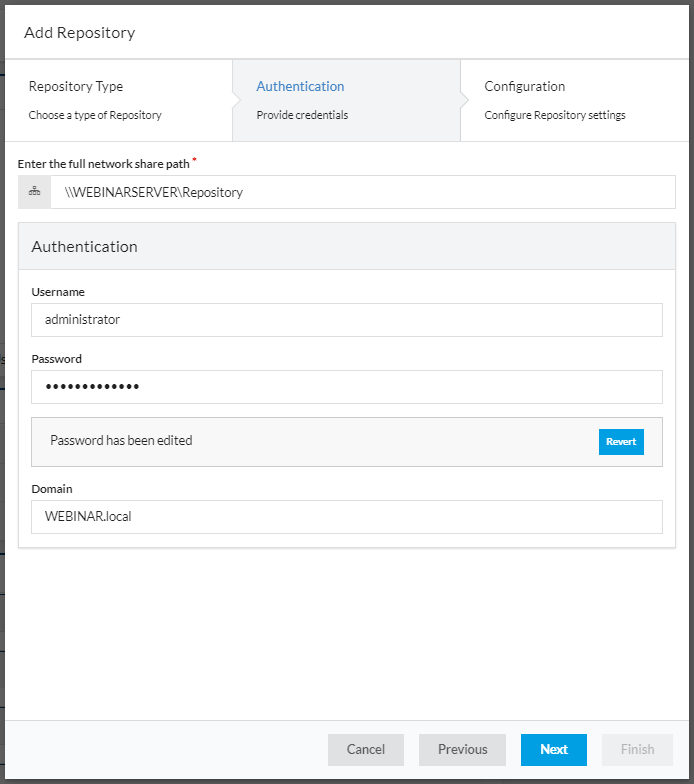
We recommend ensuring that the ‘Domain’ field has been filled. If you have specified a domain account, then enter the domain where the account is located. If you are using an account that is local to the machine where the share is located, then enter the hostname of the computer where the share is located. This will look similar to the example below:
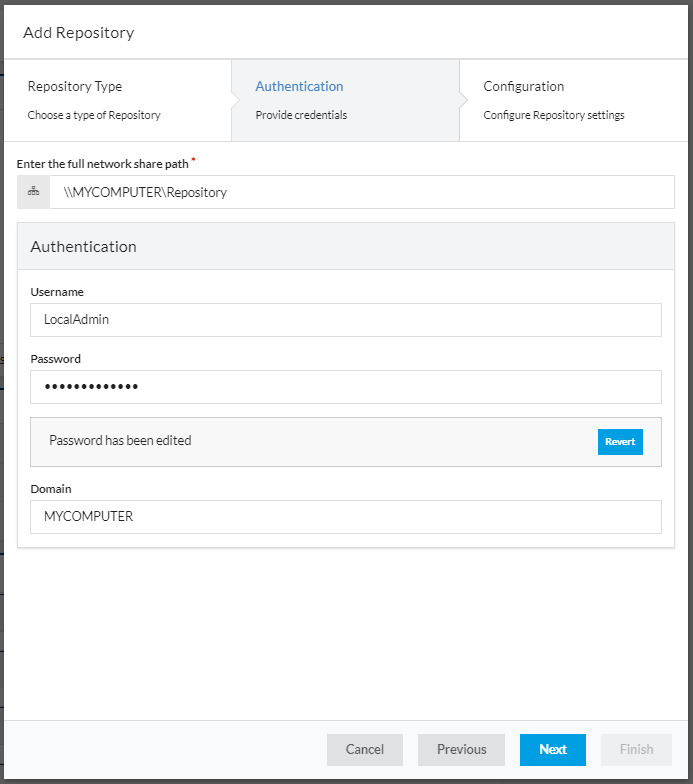
When the backup starts, these authentication credentials are sent to the agents, which then use the credentials to access the share directly. If the authentication is left empty, then anonymous access will be used.
On the final page of the wizard, you can specify additional options for the repository:
Custom Name - This is a custom name that will be displayed in the Site Manager user interface for the repository.

If this is left blank, it will default to the network path of the repository:

Purge oldest backup set(s) - If this option is set, the oldest backup set(s) will be deleted once the free space has reached the specified threshold.
Simultaneous Scheduled Backups - This value will set the number of simultaneous backups that can take place to the repository at the same time. The more simultaneous backups that take place, the more the bandwidth will need to be shared. The number of simultaneous backups that you specify will depend on your network bandwidth.
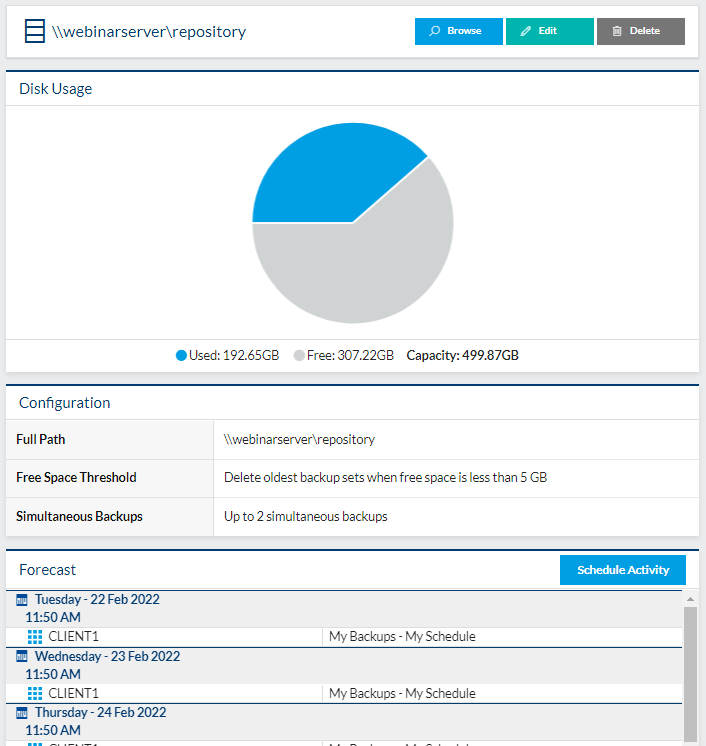
Once you are happy with the options that you have selected, press ‘Finish’. The repository will then be shown in the list of existing repositories. Selecting a repository will provide you with more information about it, including: disk usage, the repository configuration, and a forecast of upcoming scheduled backups. The repository can be edited, browsed, or deleted at any time.
Blog posts in this series
Adding a computer and installing an Agent remotely
Installing the Agent manually then adding that computer to Site Manager
Definitions - What are they
Schedules - What are they
Repositories - What are they
Scheduling Backups with Macrium Site Manager
Browsing a repository and recovering a file
Restoring an image remotely using Macrium Site Manager

Scheduling Backups with Macrium Site Manager
Site Manager - Schedules - What are they?


