Cloning a Disk with Macrium Reflect 7
Update: This blog post is about an older version of Macrium Reflect. There is a more up-to-date blog post about here: Cloning a Disk with Macrium Reflect 8.
How to migrate your old PC to a new one
Everyone knows how exciting it is to get a new computer and all the benefits this brings to our lives. Even upgrading from an HDD to an SSD can bring a massive (and exciting) increase of performance for most PCs. Everything goes perfectly until we want to have exactly the same data that was on the old PC.
We know that this job could be annoying, and losing information is not an option we want to consider. We have apps, programs, files, and settings that we want to keep. But, we don’t need to do it manually; we can use Macrium Reflect to migrate the entire Microsoft operating system (MOS) from the old PC to the new PC.
The process that we will use is Cloning.
It is possible to clone an entire hard drive or specific partitions on a hard drive. This is useful if you are upgrading to a larger hard drive. With Macrium Reflect you can boot the target disk on the same system after cloning. Cloning your hard drive creates a bootable new hard drive with the state of your computer at the time you undertook the clone. You can clone to a hard drive installed in your computer or to a hard drive installed in a USB hard-drive Caddy.
Important: Windows cannot boot from a USB connected drive. This is a restriction imposed by Windows. If you clone your system disk to a USB connected external drive then, to boot your clone, the physical disk must be removed from the USB caddy and attached to your Motherboard SATA port.
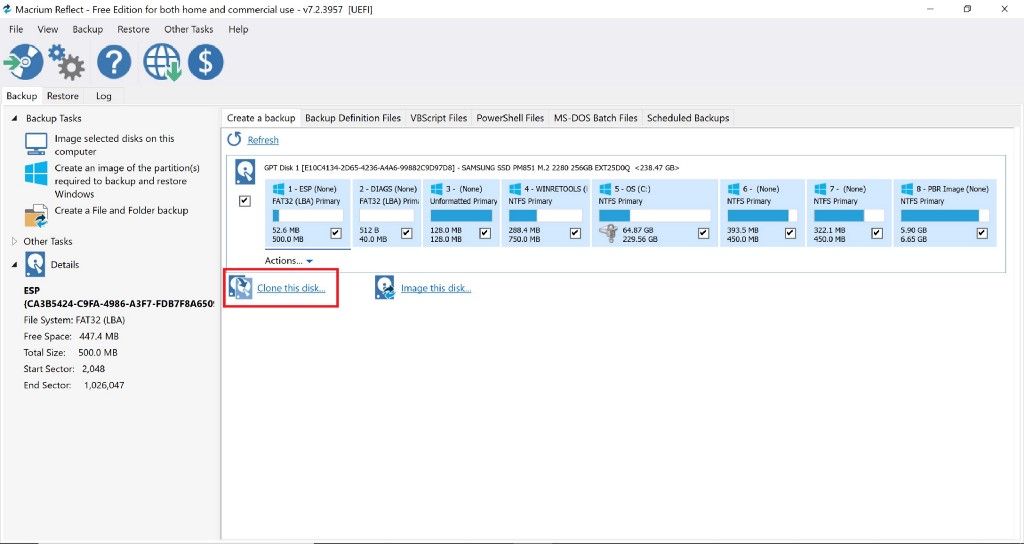
- Select the disk you wish to clone in the main application window and Click ‘Clone this disk’.
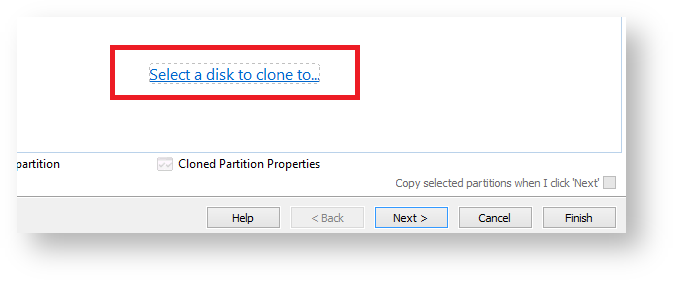
- In the wizard that opens Click Select a disk to clone to…
- Select the hard disk you wish to clone to. In this case, there is only one disk available.
If you do not want to modify the order or size of partitions of the clone, click Next. This is the default behaviour. Alternatively, drag the partitions you want to clone, the red arrow below shows this.
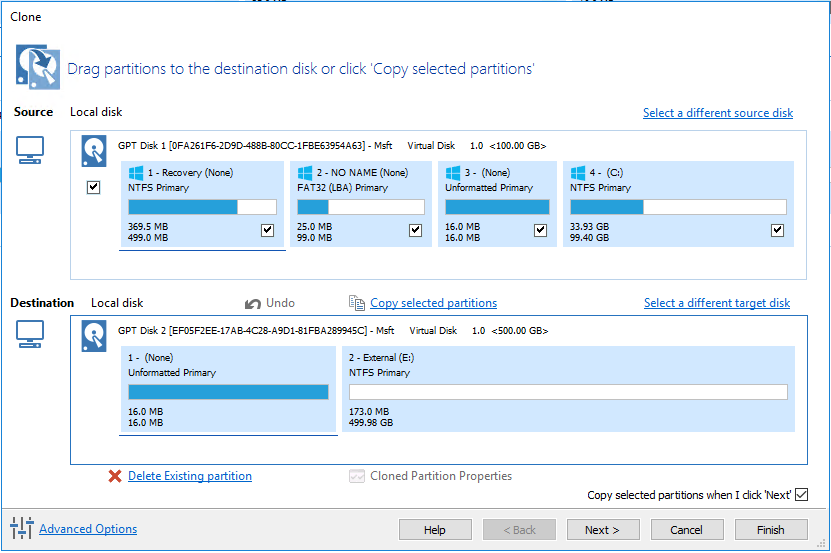
You can modify the size of each partition to fit the new disk if required.
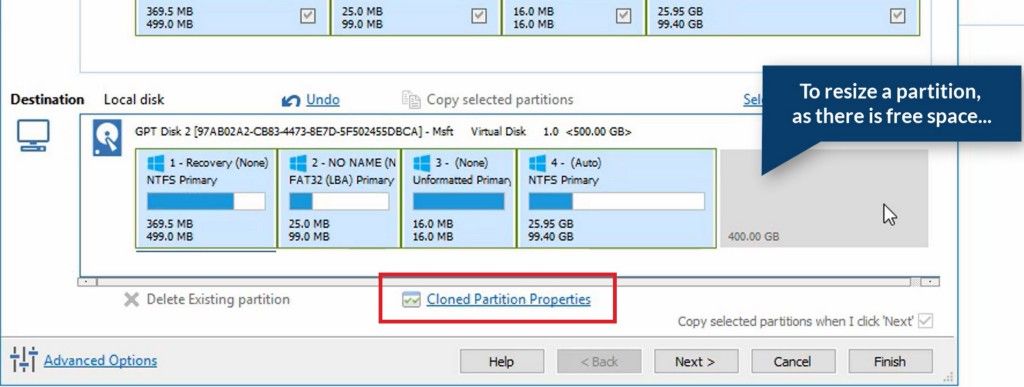
To modify the partition sizes, click Cloned Partition Properties and adjust the size of the partition by:
-
Setting the partition size precisely using the Partition Size entry box.
-
Resize the partition automatically by clicking Maximum size, Minimum size or Original size.
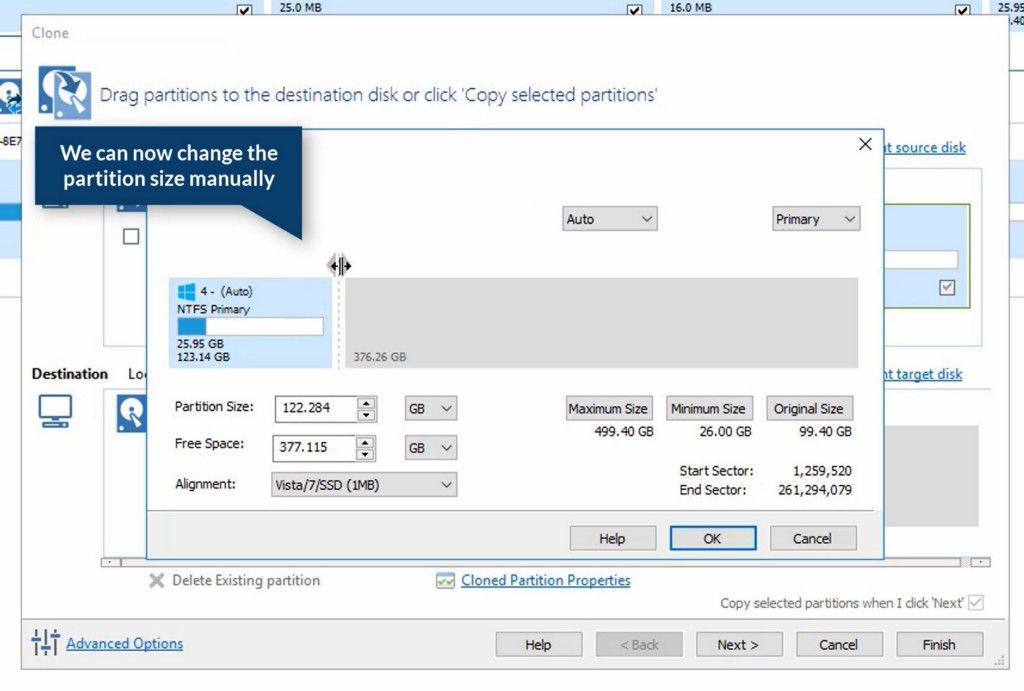
- Click OK. And then Next
The options to Add Schedule, Edit Schedule or Delete Schedule is displayed.
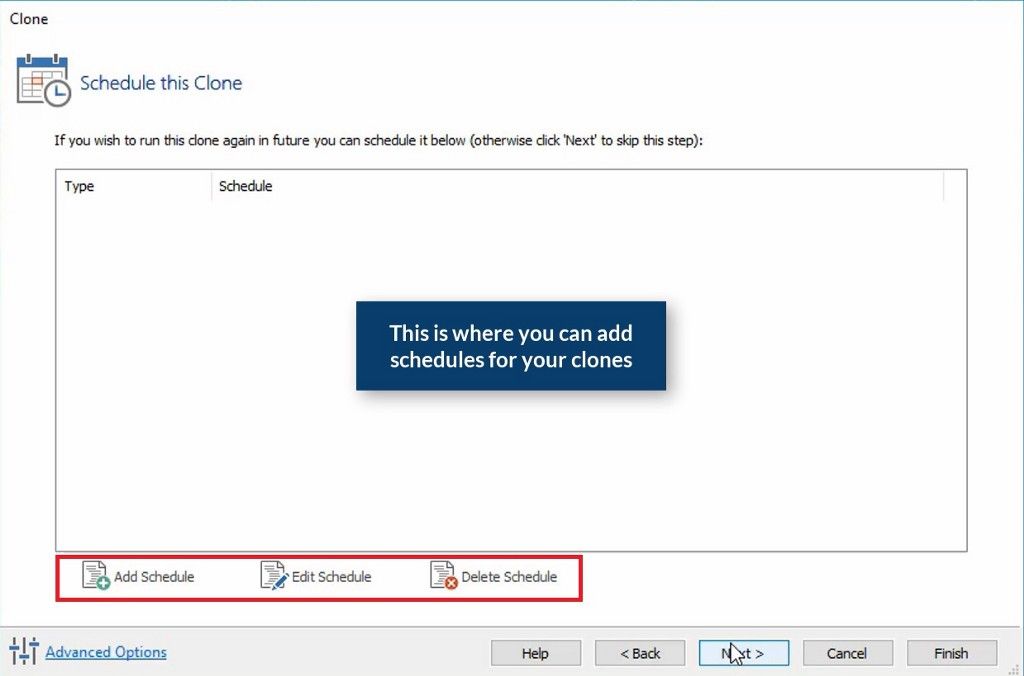
When you add a Schedule this window will appear with all the options:
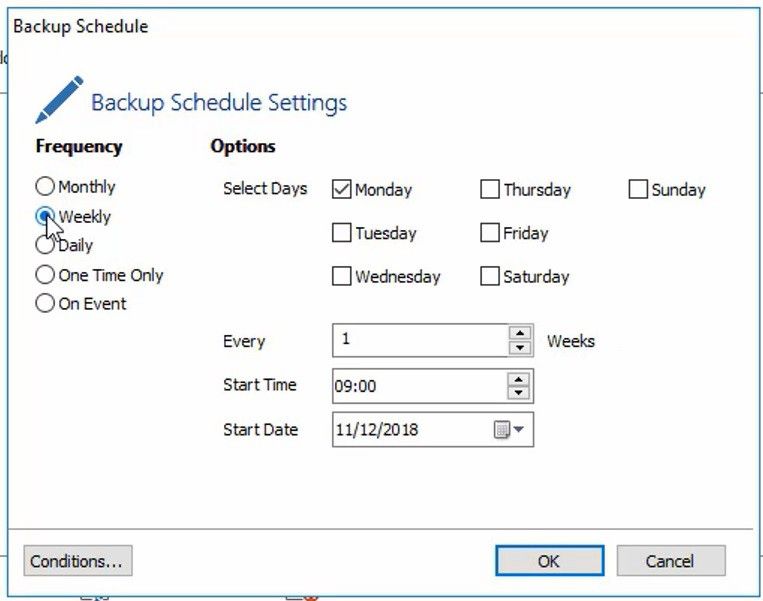
-
Make any required changes and click Next.
-
Review the settings and click Finish.
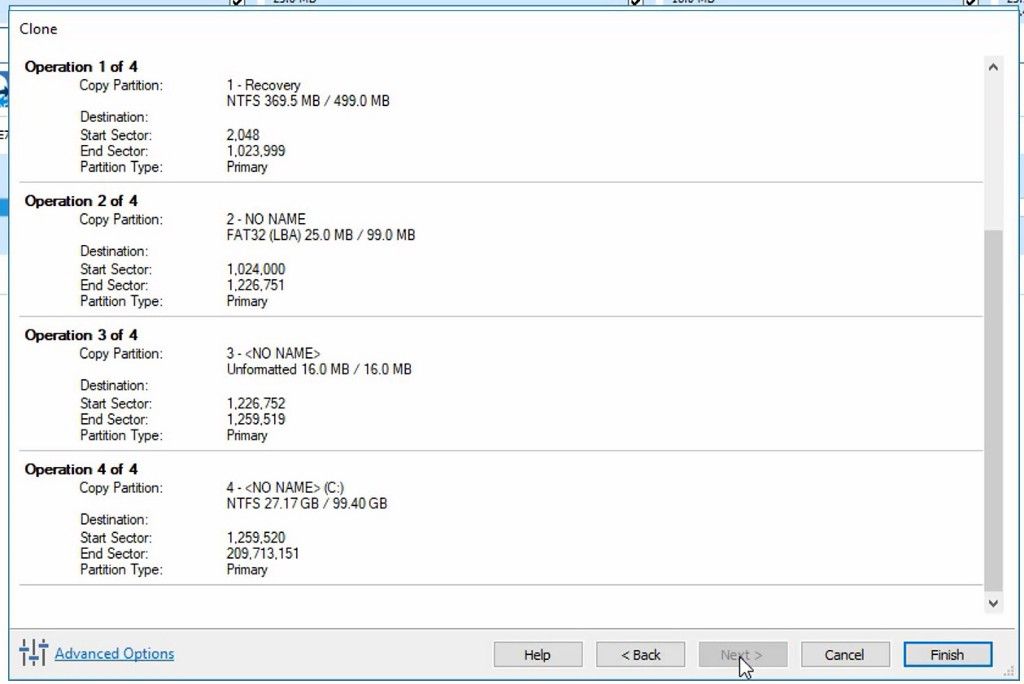
- Verify the settings in Backup Save Options and if appropriate, click OK.
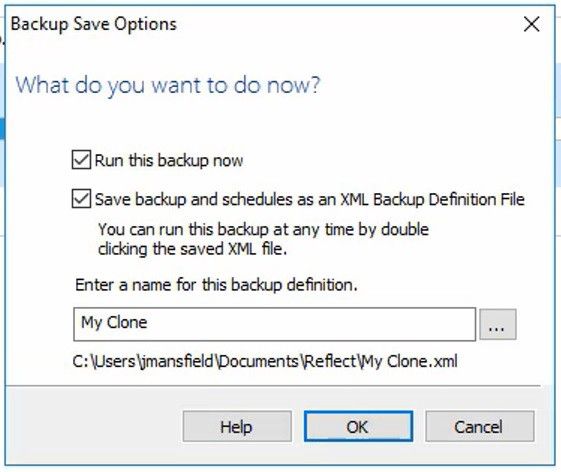
If you want to run the Clone at this point, select ‘Run this backup now’ and click OK.
- A Warning box will appear, if it is appropriate click Continue.
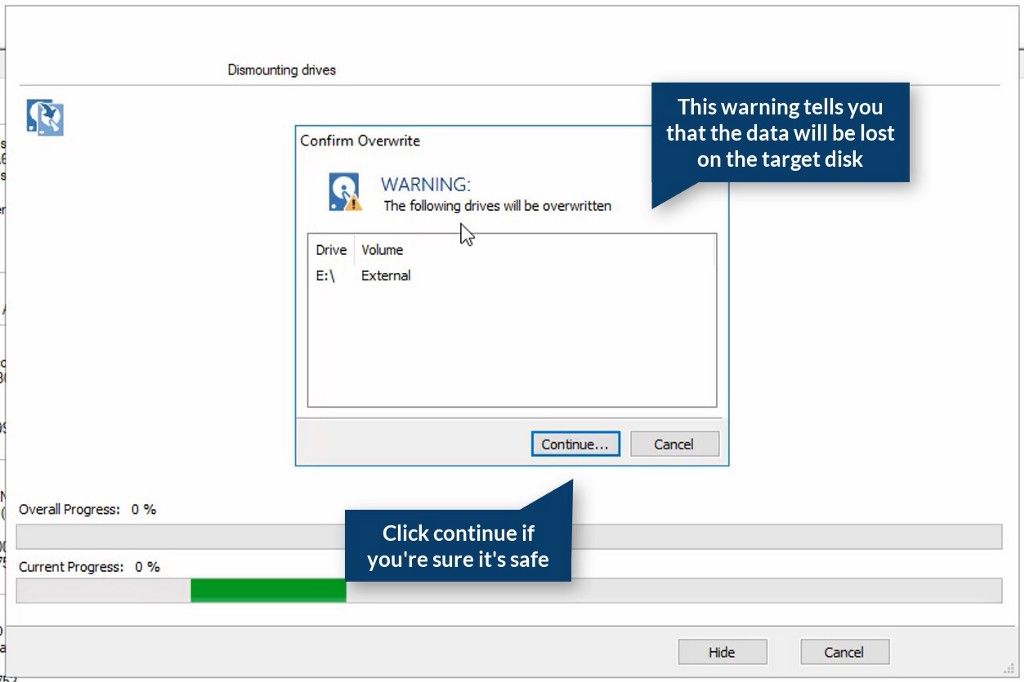 Important: The target disk for the clone operation will be overwritten. This is unrecoverable, so please ensure that the target disk contains no valid data.
Download a 30-day Trial of Macrium Reflect for Home or Business use.
Remote Repository Sync with Macrium Site Manager
Macrium Reflect Changed Block Tracker


